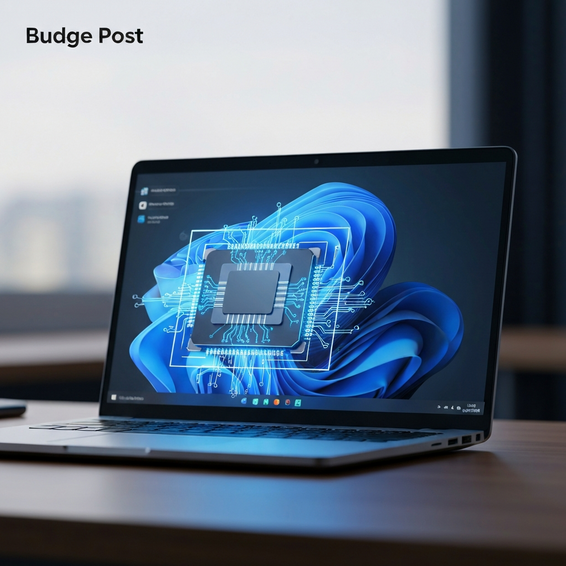
How to Fix a Slow Windows 10 Laptop: Ultimate IT Guide
Booting up your PC shouldn’t leave you with enough downtime to brew a whole pot of coffee. If you find yourself waiting several minutes just for your desktop to become responsive, you’re likely running into a deeply frustrating hardware or software bottleneck.
It happens to the best of us: over time, fragmented drives, software bloat, and sneaky background processes can drag down a computer’s performance. That blazing-fast machine you bought a few years ago can slowly degrade into a sluggish nightmare, tanking your productivity along the way.
Fortunately, bouncing back to peak speeds doesn’t always mean dropping cash on a brand-new computer. If you are trying to fix slow windows 10 laptop performance, you are absolutely in the right place. Throughout this comprehensive guide, we’ll walk through some immediate quick fixes, dig into advanced IT solutions, and cover long-term system best practices.
Why You Need to Fix a Slow Windows 10 Laptop
Figuring out the root cause behind Windows 10 lag is the crucial first step toward fully optimizing your machine. In most cases, a slow laptop isn’t brought down by just a single issue. Rather, it’s usually the result of several compounding technical factors working against you.
One of the most notorious culprits out there is the dreaded “100% disk usage” bug. When your hard drive is stuck constantly reading and writing data, the operating system is forced to queue up even the most basic tasks, which ultimately creates massive system-wide lag. You’ll see this happen a lot on older machines that still run on mechanical Hard Disk Drives (HDDs).
RAM bottlenecks act as another major limiting factor. Modern web browsers and Electron-based applications are incredibly memory-hungry. The moment your physical RAM maxes out, Windows shifts over to using your hard drive for virtual memory (known as the pagefile), causing performance to plummet.
Finally, thermal throttling can severely cripple your processor’s overall speed. Because laptops inherently have limited cooling capabilities, a CPU that runs too hot from dust buildup or intense workloads will prompt Windows to intentionally slow things down to prevent permanent hardware damage.
Quick Fixes / Basic Solutions
Before you start messing with the command line or grabbing a screwdriver to open your laptop’s chassis, try knocking out these essential quick fixes. These straightforward, actionable steps can actually resolve the vast majority of everyday performance hiccups and instantly speed up Windows 10.
- Restart Your Laptop: It might sound incredibly cliché, but a proper reboot does wonders by clearing out your system RAM, halting active memory leaks, and killing any frozen background services. Just make sure to explicitly use the “Restart” option rather than “Shut Down.” Because of Windows 10’s Fast Startup feature, a standard shutdown doesn’t actually clear the kernel session completely.
- Disable Startup Programs: Plenty of applications quietly configure themselves to launch the very second you log in. To stop this, press
Ctrl + Shift + Escto open the Task Manager. From there, navigate over to the “Startup” tab, right-click any non-essential programs (such as Spotify, Skype, or various game launchers), and hit “Disable.” - Change Power Settings: Out of the box, laptops usually default to a “Balanced” or “Power Saver” plan to preserve battery life. To uncap your CPU’s speed, simply right-click the battery icon located in your taskbar, head into Power Options, and select the “High Performance” profile.
- Uninstall Bloatware: It’s no secret that manufacturers love to pack new laptops with unnecessary trial software and redundant brand utilities. Reclaim your resources by navigating to Settings > Apps > Apps & features, and taking a few moments to remove anything you don’t actively need or use.
- Run Disk Cleanup: Type “Disk Cleanup” right into the Windows search bar to pull up this handy built-in tool. Select your primary C: drive, check the boxes for Temporary Files along with the system cache, and press OK. Running this quick process can easily clear out gigabytes of otherwise wasted storage space.
Advanced Solutions for IT and Devs
If those basic steps weren’t enough to resolve your performance headaches, it’s officially time to look under the hood. Looking at this from an IT perspective, truly optimizing system resources means interacting directly with both the hardware architecture and the OS kernel itself.
1. Upgrade to an SSD and Expand RAM
When all else fails, the absolute best way to maximize laptop performance is simply upgrading the physical hardware. Swapping out a sluggish old SATA HDD for a modern NVMe or SATA Solid State Drive (SSD) can realistically decrease your boot times from agonizing minutes down to mere seconds. In fact, pairing an affordable 1TB SSD alongside a memory upgrade to 16GB of RAM has basically become the golden rule of modern computing.
2. Run DISM and SFC Scans
Sometimes, corrupt Windows system files are the hidden culprits behind intense, unexplained system lag. To fix this, open Command Prompt as an Administrator and launch the System File Checker by typing sfc /scannow, then press Enter. If that initial scan fails to resolve the corruption, step it up a notch by running the Deployment Image Servicing and Management tool. Just type DISM /Online /Cleanup-Image /RestoreHealth and let the process run.
3. Adjust Virtual Memory (Pagefile)
If you constantly receive warnings about running out of memory, there’s a good chance Windows is mismanaging your pagefile. You can take control by navigating to Advanced System Settings > Performance Settings, and then clicking the Advanced tab. Hit the “Change” button under Virtual memory, uncheck the automatic management option, and choose Custom size. From there, set both the initial and maximum size to roughly 1.5x to 2x your current physical RAM (calculated in megabytes).
4. Disable Visual Effects
Out of the box, Windows 10 is packed with fluid animations, sleek transparency effects, and subtle window shadows that actively drain GPU and CPU resources. To turn these off, open your Start Menu, search for “Adjust the appearance and performance of Windows,” and select the “Adjust for best performance” toggle. Sure, this strips away a lot of the modern visual fluff, but it dramatically improves UI responsiveness on older hardware.
Best Practices for Windows 10 Maintenance
Consistency is absolutely key when it comes to maintaining a healthy, snappy operating system. If you wait until your PC grinds to a complete halt before taking action, you are only setting yourself up for serious frustration. Instead, try implementing these standard best practices to ensure long-term stability.
First and foremost, always keep your system updated. Microsoft regularly pushes out vital patches that resolve known high disk usage bugs and plug up pesky memory leaks. Make it a habit to visit Settings > Update & Security to ensure that Windows Update is actively running in the background.
Second, be sure to enable Storage Sense. This fantastic built-in Windows 10 feature automatically frees up valuable space by routinely deleting temporary files and emptying out your recycle bin. It’s an important step, considering a hard drive stuffed to the brim operates significantly slower than a neatly organized one.
Finally, resist the urge to install multiple antivirus programs. Having overlapping security suites installed means they will constantly fight one another for control over your file system, quickly bringing your laptop to an absolute standstill. For the vast majority of users, Windows Defender—paired with some common-sense safe browsing habits—is more than sufficient. On the other hand, if you require advanced networking tools and deep server insights, be sure to check out our detailed guide on setting up a HomeLab environment safely.
Recommended Tools and Resources
Utilizing the right software tools is crucial if you want to keep your laptop running as smoothly as possible for years to come. Do your best to avoid those “snake oil” registry cleaners plastered all over the web; instead, rely on the trusted, proven utilities that actual IT professionals use.
- Microsoft Sysinternals Suite: Specifically, we recommend looking into Process Explorer. Consider it a massive upgrade over the default Windows Task Manager, granting you the ability to see exactly which specific sub-processes are actively eating up your CPU.
- BleachBit: This is a fantastic, completely open-source alternative to CCleaner. It efficiently helps clear your cache, delete tracking cookies, and scrub away hidden junk files without constantly pushing you to buy a premium subscription.
- Hardware Upgrades: As we mentioned earlier in the guide, hardware is truly king. We highly recommend expanding your available memory with Crucial RAM Kits and smoothly migrating your entire OS using the excellent cloning tools provided by Samsung EVO SSDs.
- Internal Guides: If you are hungry for more in-depth OS troubleshooting tips and administrative walkthroughs, take some time to explore our comprehensive Windows optimization guides.
Frequently Asked Questions
Why is my Windows 10 suddenly so slow and lagging?
More often than not, a sudden burst of lag is triggered by Windows quietly downloading hefty updates in the background. It could also be the result of a scheduled antivirus scan kicking off, or a rogue application suffering from a severe memory leak. Your best bet is to pull up your Task Manager (using Ctrl + Shift + Esc) to accurately pinpoint exactly which process is currently maxing out 100% of your CPU or Disk.
Will adding more RAM fix my slow laptop?
Yes, it absolutely will—especially if your current setup is limping along on just 4GB or 8GB of RAM. Keep in mind that modern web browsers are incredibly memory-intensive these days. By upgrading to 16GB, you will finally give your operating system the vital breathing room it needs to multitask smoothly, all without having to fall back on sluggish virtual memory.
Does upgrading to an SSD speed up an old laptop?
Without a doubt. Swapping out a clunky old mechanical hard drive for a lightning-fast Solid State Drive is arguably the single most impactful upgrade you can possibly make. Making this change will drastically reduce your initial boot times, dramatically speed up standard application launches, and effortlessly eliminate the vast majority of micro-stutters.
Is it safe to disable background apps in Windows 10?
Yes, it’s perfectly safe. Disabling unnecessary third-party background applications effectively prevents them from needlessly chewing up your idle system resources. That being said, you should definitely avoid disabling core Microsoft applications or crucial system-level driver services unless you know exactly what they are designed to do.
Conclusion
Dealing with a sluggish, uncooperative computer can be incredibly frustrating, but thankfully, it rarely equates to a permanent death sentence for your current hardware. Once you understand exactly what is causing those underlying performance issues, applying the right troubleshooting techniques can easily revive an aging machine.
Whether you are tackling simple tasks like disabling stubborn startup programs or executing advanced IT solutions like managing virtual memory and installing a brand-new SSD, there are countless avenues available to optimize your system. By taking the time to successfully fix slow windows 10 laptop bugs, you will significantly extend the lifespan of your computer while quickly restoring your daily workflow efficiency.
Don’t let unnecessary software bloat hold you back any longer. Start implementing these practical best practices today, prioritize keeping your system updated, and get ready to enjoy a significantly faster, much more responsive Windows 10 experience.