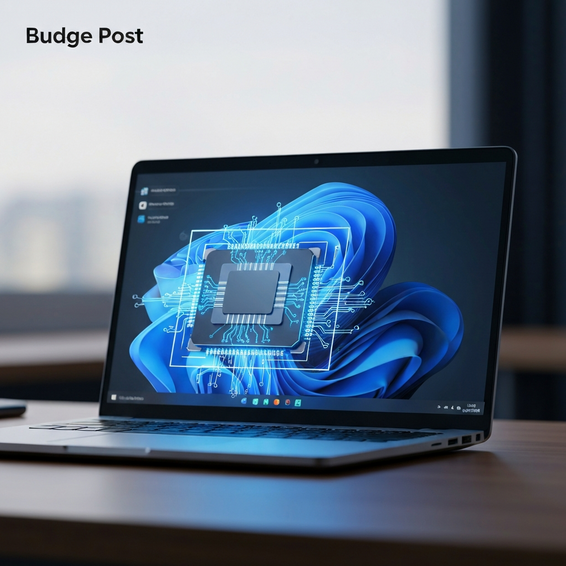
How to Improve Laptop Speed Windows: The Ultimate Dev & IT Guide
Is your computer taking ages just to boot up, launch your favorite apps, or compile a new batch of code? When you rely heavily on your laptop for intense workloads, gaming, or daily software development, dealing with constant system lag isn’t just annoying—it’s a massive productivity killer. Figuring out exactly how to improve laptop speed windows is vital if you want to keep your workflow smooth and squeeze every last drop of life out of your current hardware.
Whether your goal is to optimize Windows 10 or you’re hunting for tricks to boost Windows 11 performance, the core principles of tuning your system are pretty much identical. As time passes, every operating system starts hoarding useless temporary files, bloated registry entries, and overly aggressive background services. It’s a slow, creeping software decay that can easily make even top-tier, expensive hardware feel like it belongs in a museum.
Rather than giving up and buying a new computer, we’re going to walk through the exact steps you need to turn that sluggish machine back into a powerhouse. Ranging from quick interface tweaks to deeper, IT-level configurations, we’ll cover everything required to reclaim your missing compute resources. Let’s dig into the actual technical reasons your system degrades over time, and more importantly, how you can fix those issues for good.
Why This Problem Happens: Understanding How to Improve Laptop Speed Windows
Before we start flipping switches and changing settings, it really helps to understand why your system bogged down in the first place. Windows is a wonderfully complex operating system designed to run on a massive variety of hardware and software configurations. Unfortunately, having that kind of universal flexibility often comes at the direct expense of baseline performance.
One of the most common culprits is hardware bottlenecking, which usually points right to your storage drive and memory. If your laptop is still chugging along on an older mechanical Hard Disk Drive (HDD), the inherent read/write latency will dramatically slow down almost every OS operation. Even if you’ve already made the jump to a Solid State Drive (SSD), filling that drive past 85% capacity can drastically reduce its speed. This happens because of the specific way NAND flash memory struggles to handle wear-leveling when it runs out of empty space.
Another major contributing factor is resource exhaustion from excessive background services. Far too many applications quietly install hidden update checkers, telemetry trackers, and startup routines that run silently without you ever knowing. When dozens of these processes stack up, they eat away at vital CPU cycles and RAM. Finally, we can’t ignore thermal throttling. Often caused by simple dust buildup and dried-out thermal paste, this forces your laptop’s CPU to purposefully slow itself down just to avoid melting.
Quick Fixes / Basic Solutions
If you’re in a pinch and need to instantly speed up slow PC performance, start with these fundamental adjustments. Not only are these quick fixes incredibly easy to implement, but they also provide an immediate, noticeable boost to how responsive your system feels.
- Manage Task Manager Startup: Press Ctrl + Shift + Esc to quickly open your Task Manager. Click over to the Startup tab, review the list, and disable any non-essential applications from launching the moment you turn on your computer.
- Run Storage Sense: Navigate to Settings > System > Storage and toggle on Storage Sense. This fantastic built-in tool will automatically clean up hard drive space by routinely deleting temporary files and emptying your recycling bin for you.
- Adjust Visual Effects: Hit the Windows key, type “Advanced system settings,” and click on Settings under the Performance section. Select the “Adjust for best performance” option. This turns off heavy UI animations and window transparency effects that drain resources.
- Change Power Plan: Open up your Control Panel, head to Power Options, and select the “High Performance” plan. Doing this stops the operating system from artificially throttling your CPU just to save a bit of battery power.
- Uninstall Bloatware: Take a few minutes to scroll through your installed apps. Ruthlessly remove OEM-provided software, pre-installed promotional games, and trial anti-virus programs that are doing nothing but running unnecessarily in the background.
Advanced Solutions for Devs and IT Pros
For developers, system administrators, and general power users, standard UI tweaks are rarely going to cut it. If you want to squeeze out maximum performance, you have to get your hands dirty and dive deeper into the operating system’s core behaviors. These advanced solutions are practically mandatory for anyone running heavy code environments, local databases, or intensive virtualization.
To start, you’ll want to restrict the memory consumption of the Windows Subsystem for Linux (WSL2). Out of the box, WSL2 is allowed to dynamically consume up to 50% of your total RAM, which usually shows up in Task Manager as the infamous Vmmem process. You can easily cap this by creating a simple .wslconfig file right in your user directory and setting a hard memory limit (for example, memory=8GB). This single tweak is a lifesaver, as it prevents sudden system-wide memory exhaustion during massive code compiles.
Another smart move is disabling the Windows Search Indexer for your massive code directories. The indexer’s job is to constantly scan files to make your search bar faster. However, forcing it to parse through hundreds of thousands of node_modules or dense vendor files will relentlessly thrash your hard disk. Dive into the Settings app and explicitly exclude your active development folders from Windows Search entirely.
You can also leverage community-built PowerShell scripts to aggressively debloat Windows. Excellent tools like the Windows Utility created by Chris Titus Tech allow you to easily strip out native telemetry, disable Cortana, and kill off unnecessary scheduled tasks with just a single script execution. Just remember to play it safe—always create a System Restore point before you let a script make automated registry modifications.
If software tweaks aren’t enough, it might be time to look at your hardware. Performing an SSD upgrade by swapping out an older SATA drive for a blistering fast Gen 4 NVMe SSD will drastically improve all of your I/O operations. Pair that drive upgrade with a RAM expansion (aiming for at least 16GB, or ideally 32GB for modern workflows), and your aging laptop will genuinely feel like a brand-new machine.
Best Practices for Long-Term Optimization
Optimizing your laptop isn’t a “set it and forget it” event; it actually requires a bit of ongoing maintenance. To keep your system running as smoothly as the day you bought it, you need to establish a simple routine that prioritizes both software hygiene and physical hardware health.
As a golden rule, try to always maintain at least 15-20% of free space on your primary OS drive. SSDs absolutely require a buffer of empty blocks so they can perform TRIM operations and wear-leveling efficiently. If you stubbornly fill your drive right to the brim, your write speeds are going to plummet. If you happen to run a HomeLab server setup, think about offloading your large static files, media, and backups to a network-attached storage (NAS) device.
Additionally, try to rely on Windows Defender rather than weighing down your system with heavy third-party antivirus suites. The modern version of Windows Defender is deeply integrated and highly optimized for the OS kernel, meaning it uses a fraction of the resources compared to commercial alternatives. Combine that built-in security with smart, safe browsing habits, and you will naturally reduce background processes across the board.
Lastly, don’t forget to physically clean your hardware. Grab a can of compressed air and blow out the dust from your laptop’s intake and exhaust vents every six months or so. Keeping those internal temperatures down directly prevents CPU thermal throttling, ensuring you actually get the maximum clock speeds you paid for during intensive workloads. Feel free to check out our other Windows tips for even more hardware maintenance routines.
Recommended Tools and Resources
Having the right tools on hand makes the entire optimization process significantly easier and much less stressful. Whether you are actively upgrading your physical hardware or just doing some routine software cleanup, here are a few highly recommended resources to help you achieve maximum laptop speed.
- Samsung 990 PRO NVMe SSD: The ultimate SSD upgrade for anyone looking to achieve blazing fast read/write speeds. It’s absolutely perfect for shortening boot times and speeding up large file transfers.
- Crucial RAM Kits: Upgrading your memory is arguably the fastest way to improve heavy multitasking. Just be absolutely sure you buy the correct DDR4 or DDR5 SODIMM kit that matches your specific laptop model.
- Electric Air Duster: A brilliant, reusable alternative to traditional canned air. It’s perfect for safely blowing out dust from laptop heat sinks and preventing pesky thermal throttling.
- BleachBit: A fantastic free, open-source software alternative to CCleaner. It safely wipes away cache files and broken registry keys without sneaking any unwanted adware onto your machine.
Frequently Asked Questions
Does upgrading to Windows 11 slow down older laptops?
It certainly can. Windows 11 comes with much stricter hardware requirements, heavily relying on features like TPM 2.0 and Secure Boot. If your laptop only barely meets the minimum spec sheet, running Windows 11 might feel noticeably sluggish due to the heavier UI elements and constant background security features. Honestly, sticking to Windows 10 until its official End of Life in 2025 is a perfectly fine strategy for older machines.
Will adding more RAM make my laptop faster?
Yes, significantly. If you are a user who frequently maxes out your memory (which is incredibly common when running dozens of browser tabs or heavy development tools), your operating system is forced to start paging memory over to your storage drive. Adding more RAM outright prevents this terrible bottleneck, ensuring your multitasking remains completely smooth.
What is the best way to reduce background processes?
The single most effective method is manually managing your startup applications via Task Manager, combined with aggressively uninstalling software you no longer use. Whatever you do, avoid third-party “PC Booster” programs. Ironically, these programs just run in the background themselves, consuming the exact same system resources they claim to be freeing up.
Conclusion
System performance decay is just an inevitable part of using any operating system over a long period, but it absolutely doesn’t have to be a permanent sentence. By taking the time to understand the underlying causes of system lag, you can implement highly effective strategies to reclaim your hardware’s true processing capabilities.
Learning exactly how to improve laptop speed windows is an ongoing journey of maintaining clean software habits, actively managing your startup items, and occasionally investing in strategic physical hardware upgrades. Take the time to apply these fixes today, and you’ll be able to enjoy a vastly faster, far more responsive computing experience tomorrow.