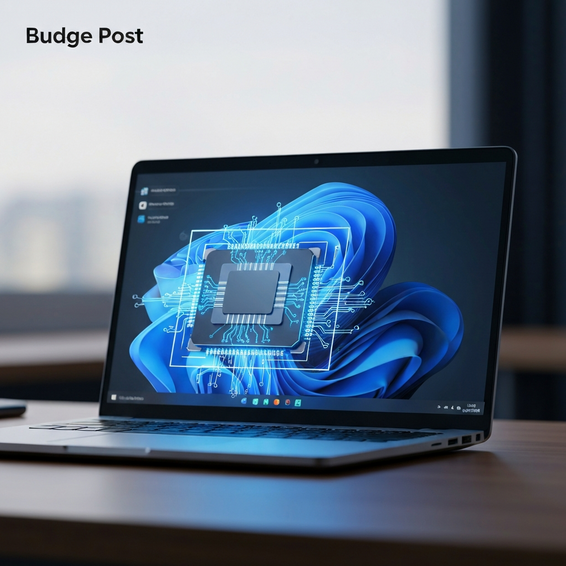
The Ultimate Windows Performance Optimization Guide (2024)
Staring blankly at a loading screen while your computer grinds to a halt is incredibly frustrating, but you definitely aren’t alone in dealing with it. Whether you’re a developer compiling complex code, a system admin juggling multiple virtual machines, or just a power user trying to get through the workday, a sluggish operating system is a massive productivity killer. That’s exactly why having a reliable windows performance optimization guide is so essential.
While Windows is undeniably a powerhouse of an operating system, it has a habit of collecting digital clutter over time. Sneaky background processes, bloated registry entries, and a mountain of unnecessary startup apps can slowly choke your system resources. If you let it go unchecked, even a top-tier, high-end rig can start to feel like a dusty, decade-old machine.
Throughout this guide, we’ll walk through everything from rapid, everyday fixes to more advanced, IT-level configurations. By the time you reach the end, you’ll have a clear set of actionable steps to speed up Windows 10 and boost Windows 11 performance without breaking a sweat. It’s time to stop settling for a sluggish PC—let’s jump right into the ultimate system resources optimization checklist.
Why You Need a Windows Performance Optimization Guide
Before we start tweaking settings, it helps to understand exactly why Windows tends to bog down in the first place. Every single time you install a new app or program, it leaves behind a little digital footprint. Over months and years of regular use, those tiny footprints accumulate into massive roadblocks that drag down your CPU, RAM, and storage drives.
There are actually quite a few technical factors that contribute to degraded PC speed. Pinpointing these common bottlenecks is a crucial first step before you begin any serious troubleshooting.
- Resource Contention: When too many background applications are running, they end up fighting for limited CPU cycles and memory. Once your system hits 100% RAM utilization, it has to start paging memory to your storage drive—a process that drastically reduces your overall speed.
- Disk Fragmentation and Clutter: Even if you have a blazing-fast modern SSD, a drive that is nearing 100% capacity will suffer from severely reduced write speeds. Leftover temporary files, cached Windows updates, and ancient installer files can eat up gigabytes of precious space.
- Bloatware and Telemetry: Manufacturer-installed bloatware and native Windows telemetry processes are notorious for constantly sending data back and forth. This invisible background activity quietly chews up both your network bandwidth and processing power.
- Corrupted System Files: Unexpected power loss, sudden application crashes, and failed Windows updates can corrupt your registry and core system files. Over time, this kind of underlying damage leads to frequent freezes and system hangs.
Now that we’ve identified the main culprits behind the slowdown, let’s focus on actually fixing the problem. To make things easy, we’ve broken down our solutions into quick fixes for everyday users and more advanced configurations for seasoned IT professionals.
Quick Fixes / Basic Solutions
You certainly don’t need a computer science degree or deep programming knowledge to start seeing real improvements. In fact, here are a handful of highly effective, straightforward fixes you can use to optimize your PC’s speed right away. These tweaks will only take a few minutes of your time, but they offer fantastic, immediate returns.
1. Disable Unnecessary Startup Programs
It’s incredibly common for applications to automatically set themselves to launch the exact moment you turn on your computer. Heavyweight apps like Spotify, Skype, and Adobe Creative Cloud can drastically inflate your boot time and hijack your active RAM before you even click a button.
- Press Ctrl + Shift + Esc on your keyboard to pull up the Task Manager.
- Head over to the Startup apps tab located on the left-hand navigation menu.
- Sort the list of applications by clicking on the “Startup impact” column.
- Right-click on any high-impact programs that you don’t need running immediately, and select Disable.
2. Turn On Storage Sense to Reduce Disk Usage
Fortunately, Windows includes a brilliant built-in feature designed to automatically clean up annoying temporary files, empty your recycling bin, and wipe out old Windows update files without you having to lift a finger.
- Open up your Windows Settings app, then navigate to System > Storage.
- Find the Storage Sense toggle and flip it to the On position.
- Click the arrow next to that toggle to customize your automated cleanup schedules. You can easily instruct Windows to run Storage Sense on a daily or weekly basis, or simply whenever your disk space is running low.
3. Adjust Visual Effects for Maximum Performance
By default, Windows utilizes transparent windows, slick animations, and drop-shadow effects. While they certainly look fantastic, they also consume a surprising amount of unnecessary GPU and CPU power. Disabling these aesthetic features is a classic, time-tested trick to make the user interface feel infinitely more responsive.
- Press the Windows key on your keyboard and type Advanced System Settings.
- Look under the Performance section and click on the Settings button.
- In the Visual Effects tab that pops up, select the radio button labeled Adjust for best performance. This action instantly disables all those unnecessary UI animations.
- Click Apply, and then hit OK to save your changes.
Advanced Solutions for Power Users
If you’ve already run through the basic steps and your machine is still lagging, it might be time to tackle the issue from an IT perspective. Keep in mind that these advanced tweaks require administrator access and a bit of caution, but they are also the ones that yield the most dramatic performance improvements.
1. Disable Windows Telemetry via Group Policy
Behind the scenes, Windows is constantly sending diagnostic data, tracking usage habits, and firing off error reports to Microsoft. While this data is helpful for broad corporate debugging, it definitely eats into your valuable system resources. If you are running Windows Pro or Enterprise, you can actually restrict this behavior using the Group Policy Editor.
- Press Win + R to open the Run dialog, type
gpedit.msc, and hit Enter. - Carefully navigate your way to Computer Configuration > Administrative Templates > Windows Components > Data Collection and Preview Builds.
- Double-click the entry labeled Allow Diagnostic Data.
- Set the policy to Disabled, or at the very least, limit the data collection strictly to Required diagnostic data.
2. SSD Performance Tuning and Virtual Memory
Whenever Windows runs out of physical RAM, it compensates by using a portion of your hard drive as virtual memory (known as the Paging File). Locking this down to a fixed size on your absolute fastest NVMe SSD ensures a much more consistent performance and prevents the system lag that comes from dynamic resizing.
- Open up Advanced System Settings, click on Performance Settings, and navigate to the Advanced tab.
- Under the Virtual memory section, click the Change button.
- Uncheck the box that says “Automatically manage paging file size for all drives.”
- Select your fastest SSD, choose the Custom size option, and set both your initial and maximum sizes to 1.5 times your total physical RAM (for example, if you have 16GB of RAM, you would enter 24576 MB).
3. Deep Windows Bloatware Removal Using PowerShell
Stripping away Windows bloatware is hands-down one of the most effective ways to free up background processes. While the standard Windows uninstaller usually leaves messy files behind, using community-tested PowerShell scripts will completely cleanse your operating system of all that unnecessary baggage.
By launching PowerShell as an Administrator, you gain the ability to run highly trusted debloat tools (like Chris Titus Tech’s popular Windows Utility). These powerful scripts securely gut unwanted features like the Xbox Game Bar, forced edge integrations, annoying pre-installed promotional games, and default apps you will literally never open. Going through this process will drastically cut down the number of active processes you see running in your Task Manager.
Best Practices for Ongoing Optimization
True system optimization isn’t just a “set it and forget it” task. Keeping your machine feeling snappy and responsive requires building some solid computing habits over time. Try following these straightforward best practices to ensure your system performs at its absolute peak, all year round.
- Keep Your Drivers Updated: Running outdated GPU, network, or motherboard chipset drivers is a guaranteed recipe for severe performance bottlenecks. Make it a habit to install the latest drivers directly from the manufacturer’s official website, rather than relying entirely on Windows Update to catch them.
- Run Regular Security and Malware Scans: Hidden cryptominers and malicious software can silently siphon off massive amounts of your processing power. To stay safe, schedule deep weekly scans using Windows Defender or a highly-rated third-party antivirus to confirm your system remains squeaky clean.
- Maintain SSD Health with TRIM: You should never manually defragment a modern Solid State Drive! Instead, you want to ensure the TRIM command is active, which tells your SSD how to properly manage deleted files. Just open the Command Prompt as an Administrator and type
fsutil behavior query DisableDeleteNotify. If it spits back a 0, your TRIM is working perfectly. - Reboot Regularly: Leaving your PC snoozing in sleep mode for weeks at a time is a great way to let memory leaks build up. A simple, full system restart flushes out your RAM cache, kills hung background processes, and securely installs any pending security patches.
Recommended Tools / Resources
Even though Windows brings some excellent native tools to the table, leaning on trusted third-party software can really automate and enhance your overall system resources optimization routine. If you want to take things to the next level, here are a few must-have utilities for power users.
- BleachBit: Think of this as an open-source, highly potent alternative to mainstream system cleaners. It does a phenomenal job wiping junk files, purging bloated browser caches, and clearing out heavy system logs without badgering you with annoying ads or paid subscriptions.
- O&O ShutUp10++: This is a fantastic, lightweight portable utility that hands you granular, switch-based control over Windows telemetry, deep privacy settings, and a slew of hidden background services.
- Revo Uninstaller: Whenever you delete a program through normal Windows settings, leftover registry keys and stranded folders almost always stick around. Revo guarantees a true clean sweep of your uninstalled software, keeping your file system incredibly pristine.
- Crucial System Scanner: If your machine is still chronically slow despite all these software tweaks, you might just be due for a physical hardware upgrade. Run the Crucial Memory and Storage Scanner to figure out exactly which RAM and SSD upgrades are fully compatible with your specific motherboard.
FAQ Section
Will upgrading to Windows 11 improve performance?
Honestly, it largely depends on the hardware inside your case. While Windows 11 does feature vastly improved memory management and handles background application scheduling much more efficiently than Windows 10, it also demands much stricter hardware standards—like TPM 2.0. If your rig boasts a modern processor and a fast NVMe SSD, you might actually experience a slight bump in Windows 11 performance. However, if you’re running older hardware, sticking with Windows 10 is almost always the faster, smoother choice.
Does clearing the registry actually speed up my PC?
In modern Windows environments, registry cleaners usually offer little more than a temporary placebo effect. In fact, Microsoft officially advises against using third-party registry cleaners altogether. They have a nasty habit of accidentally deleting critical system keys, which can quickly lead to fatal application crashes or the dreaded Blue Screen of Death. You are much better off sticking to standard, proven disk cleanup methods.
How much RAM do I really need for optimal speed?
If you are just doing basic web browsing and standard office work, 8GB of RAM is the absolute bare minimum you can get away with today. But if you’re a developer compiling massive codebases, a heavy gamer, or a multitasking power user juggling several demanding applications at once, upgrading to 16GB or even 32GB is really the sweet spot. Having that extra memory buffer stops your system from constantly falling back on slower virtual memory paging.
Is it safe to disable Windows Search Indexing?
If you are still running a slower, traditional mechanical hard drive (HDD), turning off Windows Search Indexing can dramatically reduce your disk usage and prevent the drive from spinning non-stop. On the flip side, if your OS is installed on a modern SSD, leaving the indexing feature enabled carries almost zero performance penalty. Plus, it makes searching for local files inside Windows Explorer feel infinitely faster.
Conclusion
At the end of the day, optimizing your operating system doesn’t mean you have to rush out and buy expensive hardware upgrades right out of the gate. By taking a more systematic approach to cleaning up old software, intelligently tweaking your background settings, and forcefully removing bloatware, you can easily breathe brand-new life into a struggling machine.
Hopefully, this definitive windows performance optimization guide has armed you with the exact, actionable steps you need to reclaim your system’s lost speed and efficiency. Try starting with the simple quick fixes: disable those heavy startup apps, tone down the flashy visual effects, and let Storage Sense do its thing. Once you feel a bit more comfortable, you can confidently move on to the advanced PowerShell debloating and virtual memory tweaks.
Why wait? Take action today! If you spend just 15 short minutes applying these settings, you will immediately notice a much snappier, highly responsive computing experience. Don’t forget to bookmark this guide so you can reference it for future maintenance runs, and feel free to share it with your IT team or friends to help boost everyone’s daily digital productivity.